How to Create Aliases on macOS with Terminal
Creating aliases allows you to make your workflow so much faster
Aliases are those badass secret identities and mysteries that developers type into their terminal to perform a task faster and make their workflow simpler. For the longest time, I procrastinated creating aliases because the thought of learning how to do it seemed really hard. But actually, it's extremely easy. And its made my life SO MUCH better, so I wanted to share how to do it.
Creating Aliases for Zsh Shell
- Go to your terminal
- Type in the command
cd ~ - Then type in
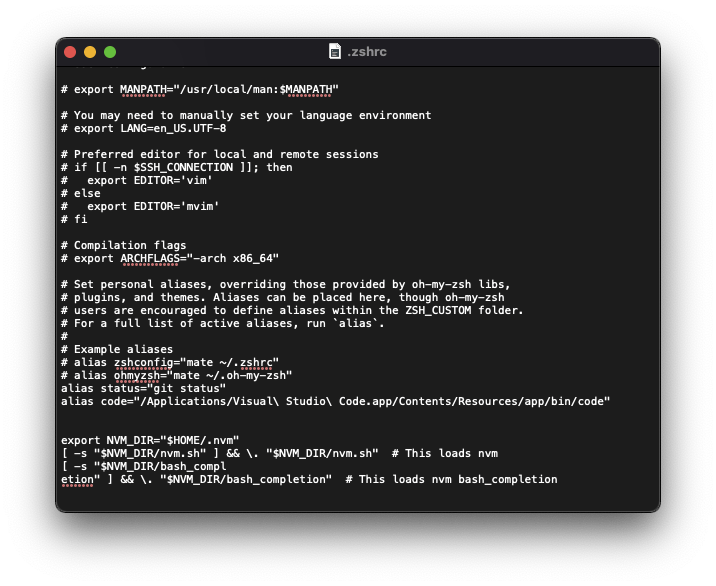
open .zshrc.zshrcfolder. You should see a screen like this:

- Scroll down to where it says something like # alias ohmyzsh="mate ~/.oh-my-zsh"
After the hashes, type in your own alias, i.e.:
alias cmsg="git commit -m"Every time I want to run
git commit -m, I can now usecmsgto do that task.Next
Cmd + Sto Save. Close the window.- THEN for the changes to take affect, you will have to enter the following in your terminal:
source .zshrc
Example Aliases
Alias names can often be hard to come up with for beginners—I know it was for me until I saw a senior engineer using some of them—so some examples would be:
alias project:start="yarn"
alias project:build="yarn project build"
alias project:test="yarn test"

alias project:start="yarn && yarn project build"
alias project="/application/documents/project/project-file"
Voilà! You can now use your alias to perform the task you want faster.
If you have any questions, feel free to DM me on Twitter !

